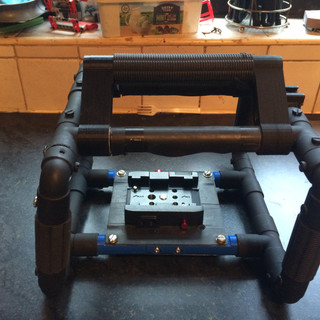
8. My final Outcome (& link to Thingiverse)
- Mar 28, 2017
- 2 min read
First, the link: http://www.thingiverse.com/thing:2210489

Once I have completed the Instructions for the assembly of the steadicam, I finally got my chance to paint it.
I thought I was not going to be able to get it done on time but the opportunity arose from a bus strike and I was unable to get into college.
1. Paint

The colour I used was a matte black camouflage paint made by Krylon. Their camo paint in particular is really good. Once sprayed, it is dry to the touch almost instantly and after 15 minutes the steadicam can be handled.
2. The hot/cold shoe


I didnt mention how to install the cold shoe mount in the instructions because when I started to make them, I could not pull it off after using the hot glue on it. But simply drill a hole through the front of the steadicam and run a bolt through it. You can use hot glue then to eliminate wobble.
3. Mounting


Like mentioned in previous articles, I wanted to use the Manfrotto style mounting system. And even though I lowered the mounting plate, My camera wouldn't slide in. So I just fixed this by making the bottom of the front steadicam window a hinge (by removing 2 outside bolts). now all I need to do is remove the two back silver screws to raise the body up as if it was a Lamborghini door as pictured below.


Conclusion
I am extremely pleased with my outcome. This version of the steadicam was exactly what I wanted to make when I made the version 3 over four years ago.
And this time around I am able to share it so people can make them much more rapidly than I have developed it and even do one better by trying to improve it even more!
If you the reader, wants to create one similar to mine you can find the list of required materials in each Build Instruction article as well as the Thingiverse link above so you can make the 3D printed parts which are vital to this Project.
Good Bye and Happy Making!
Paul.


Comments